
If you do a web search on the difference between various terms in materials engineering, you will encounter a mind-boggling array of misinformation. The following infographic summarizes basic differences between the following terms: stiffness, compliance, yield strength, rupture strength, ultimate strength, hardening, softening, ductility, rupture strain, resilience, and toughness. Of course no real stress-strain diagram looks like any of these, but the sketches are exaggerated to help illustrate the terminology.

Copyright statement: This infographic may be used freely as long as it isn’t altered in any way.
Keep reading for important clarifications!
For resilience, C and A were identified as roughly equal because the yield energy per unit volume (i.e., the area up to the yield point) was not obviously different for either C or A. Because the beginning parts of these functions were each idealized to be straight lines, the yield energies are just half the yield strain times the yield stress. In comparison to material A, material C has a larger yield strain but smaller yield stress, while the product of these is about the same for both of them to give roughly equal resilience, which is also known as yield energy per unit volume. By a similarly rough “eyeball inspection,” the rupture energy per unit volume (i.e., the area under the curve up to the “X” rupture point where the material breaks apart into separate pieces) looks about the same for all three graphs, so the toughness has been identified to be approximately equal for all of them.
The term “hardness” (not listed explicitly in the infographic) has multiple definitions. Loosely speaking, though, hardness goes in inverse proportion to one of the above-listed measures of inelastic strain (usually rupture strain). The key thing to realize is that a high-hardness material has a low strain at failure, which means it will be able to hold its size and shape all the way up to the failure threshold better than a low-hardness material. Thus, for example, a billiard ball is hard in comparison to a ball of solid gold. If some material “D” has higher strength than material “E,” then “D” will usually (but not necessarily) have higher hardness than “E.” High-hardness materials tend to be poor choices for design against structural fatigue fracture; low-hardness materials, on the other hand, can “flow” at crack tips to effectively blunt the tip and thereby reduce stress concentrations that would otherwise tend to propagate the fracture.
Please keep in mind the following cautions:
- The yield threshold is often misleadingly identified (for beginners) as the location of a sharp bend in the slope of the stress vs. strain diagram, with the graph being a straight line up to that point. However, yield is better defined to be the value of stress at which unloading back to zero stress would produce a nonzero residual strain. Real materials have a little bit of yielding (by this definition) even at small stress values, so the ASTM standard definition sets the yield stress to correspond to a 0.2% residual strain upon unloading. A far more useful and practical definition of yield stress is that it is the value of stress at which modeling the material to be elastic would produce unacceptable errors in a given engineering design or analysis. The definition based on 0.2% offset is merely the standard guideline at which it is believed (by experienced or influential engineers) that models for engineering structures would require some form of inelasticity to be reliable. If you choose to define yield stress to be the stress at which an elastic model would become unacceptable for a given engineering purpose, then its value naturally is not fixed, because “acceptability” would depend on the problem at hand. Moreover, this definition of yield stress would, unlike the precise definition based on 0.2% residual strain, include damage as well as plasticity (see below for the distinction).
- A material is elastic if stress is truly a function of strain, meaning that unloading the material will cause the stress-strain data pair to retrace (backwards) the same path that it followed to get there during the loading phase. There is nothing in this definition that requires the elastic portion of the stress-strain plot to be a straight line as shown here in the fake materials of the infographic. Not only can elasticity be nonlinear, there isn’t even a requirement for the elastic portion of the plot to monotonically increase, so it is incorrect to assert that reaching a peak in a stress-strain plot is necessarily a sign of material damage. The only way to determine that there is inelastic deformation is to include unloading in your measurements of stress-strain response in order to look for signs of hysteresis. If the material unloads along a different path than it used for loading (i.e., if unloading and loading have different slopes), then the deformation is inelastic.
- Though not covered in this infographic, the term plasticity refers to a form of inelastic deformation that gives a nonzero strain (called residual strain) after the loads are removed, whereas damage refers to a change (usually a reduction) in the unloading slope such that unloading would cause BOTH stress and strain return to the origin upon unloading (contrast this with yielding, which has strain return to a nonzero residual value).
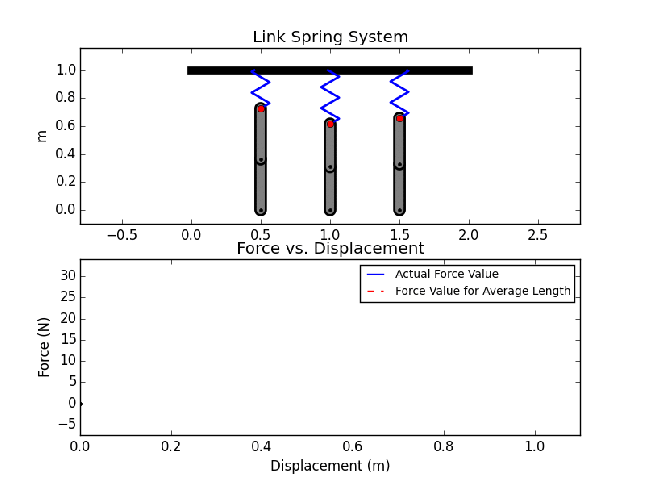
For a beginner to understand the distinction between damage and plasticity, it is very helpful to consider a simple mechanical system like the following, which shows a sliding top plate beneath which are springs and rigid links that will buckle when they experience a critical axial force. The bucking threshold is determined by both the lengths of the rigid links (shown here short and long, respectively) and the properties of the lateral support (shown here as simple springs).

Let’s now consider three buckling components (rather than just the two pictured above). The goal is to determine the overall force required to induce a given displacement of the top plate. To get a basic sense of the underlying reasons for variety in material behavior, we list below three cases corresponding to different choices for the lateral supports. In each of these plots, the solid blue line corresponds to statistically variable lengths of the rigid links, while the red dashed line shows the result corresponding to all equal-sized links to help you see that statistical variability of a material’s microstructure most profoundly affects peak load-carrying capacity rather than the initial elastic properties.
CASE 1: ELASTIC LATERAL SUPPORTS

Here the lateral supports are purely elastic and attached to a rigid wall. The other (vertical) springs are taken to be nonlinear so that infinite force would be needed to squash them to zero length. The resulting three-unit system response is as follows:

This example proves, by the way, that reaching a peak in a force vs. displacement experiment does NOT necessarily imply inelasticity. This system reaches a peak, but it follows exactly the same path upon unloading as it did in the initial compression phase. Accordingly, this system is 100% elastic!
This system furthermore illustrates the importance of specifying the nature of loading control. Here, we ran the simulation by controlling the displacement of the top plate, which gives a unique force of loading. It would be impossible to get the same result via force control because, as seen, a given force corresponds to more than one displacement. An elastic system is defined by force being a proper function of displacement. There is no requirement that this relationship be invertible to give displacement as a function of force.
Variability in the link geometry (solid blue line) causes a reduction in peak load-carrying capacity (i.e., the solid blue line does not go as high as the red-dashed line).
CASE 2: BREAKABLE LATERAL SUPPORTS

Instead of attaching each spring to a rigid wall, as was done in CASE 1, let’s suppose that they are attached to a breakable support. The lateral support behaves the same as in CASE 1 up until reaching a critical load in the lateral support, at which point the response is the same as if there is no lateral support at all. Then the overall three-component force vs. displacement plot becomes

This example is inelastic because the force vs. displacement response does not follow the same path upon unloading as it did during the initial compression phase. This example furthermore illustrates that elasticity must not be described as having the feature that the system returns to its original shape upon removal of the load. This system returns to its original configuration (from a macroscale perspective), but it isn’t elastic!
The hallmark trait of inelasticity is hysteresis, which means that the force vs. displacement plot has a loop in it. This system illustrates the concept of DAMAGE, which is irreversible changes in a system’s overall elastic stiffness. For pure damage, the force and displacement return back to the origin upon load reversal as is seen to happen in this example. Pure damage has no permanent inelastic strain, yet it is still an inelastic phenomenon. The fact that damage affects elastic stiffness would be clearer if we had included a recompression phase, where we would see that the system follows its damaged unloading path (not the original loading path) up until more damage is induced to break that final lateral support.
Variability in geometry (blue dashed line) also profoundly affects the post-peak response in comparison to the loading part of the curve. If the system had consisted of thousands of units (rather than just the 3 considered here), then variability would be seen to strongly influence the post-peak (softening) part of the response plot.
CASE 3: FRICTIONAL LATERAL SUPPORT

In this scenario, the lateral support behaves like a tightly fitted piston (e.g., a cork in a bottle) that behaves the same as a rigid support up until the force on the piston reaches a critical value needed for sliding. In contrast to CASE 2, where hitting a critical lateral force caused the lateral force to suddenly drop to zero, a frictional sliding causes the lateral force to suddenly stop increasing but instead stay at a constant value. When the loading is reversed, the frictional piston then drags against the motion to produce a residual internal lateral spring force even when the force on the three-component pusher plate is zero:

The hysteresis shows the system to be inelastic. The hallmark trait of internal friction is residual “permanent” displacement after the force on the pusher plate has been removed. In materials modeling, this phenomenon is called PLASTICITY. For many materials, plasticity is explained by movement of dislocations in the crystal structure, but that’s just one way to get plasticity. The broader definition, which requires no evidence of the physical source of plasticity, is merely that you get permanent strain upon load removal.
Interestingly, friction seems to regularize variability-induced sensitivities. As seen, after all links have experienced buckling and sliding, there is little difference between the variable and deterministic (red and blue) lines.
CASE 4: DASHPOT and MASS in the lateral support

Each of the previous cases considered all components to have zero mass. Accordingly, each of the previous 3 cases are said to be “rate independent,” which means that the force vs. displacement plot is the same for those problems regardless of how quickly the system is being deformed. This CASE 4 scenario, on the other hand, allows mass and damping to exist in the system, which leads to dynamic system response that is sensitive to the rate of loading. The following simulations include a mass at the point marked with a red dot. If the mass is zero and if the damping coefficient is infinite, then this system would behave as it did in CASE 1.


These plots show various results depending on the loading rate and amount of damping in the system. If the mass is zero and if the damping coefficient is infinite, then this system would behave as it did in CASE 1. Alternatively, even if mass and damping are high, conditions of VERY slow loading would also look nearly the same as CASE 1.
In materials modeling, rate effects can be profound (i.e., non-negligible) and easily observed for materials like silly putty or other rubbery materials like bread dough and human flesh. All materials have an intrinsic time scale required to reach equilibrium (i.e., to stop wiggling) after a loading perturbation has stopped. If the loading occurs on a time range that is shorter than this characteristic material response time, then we say it is a “high Deborah number event,” in which case the insufficient time for inertia or damping to be overcome will make the system behave more elastically than it would under slower loading. Thus, for example, bouncing a ball of silly putty would put it into a high-Deborah-number state, while slowly squashing it between your fingers is a low-Deborah-number event.
Fun trivia: the moniker “Deborah” was inspired from a version of Judges 5:5 in the bible, which refers to God seeing the mountains move (i.e., on His time scale, the mountains are flowing like a fluid and hence have a low Deborah number)!
